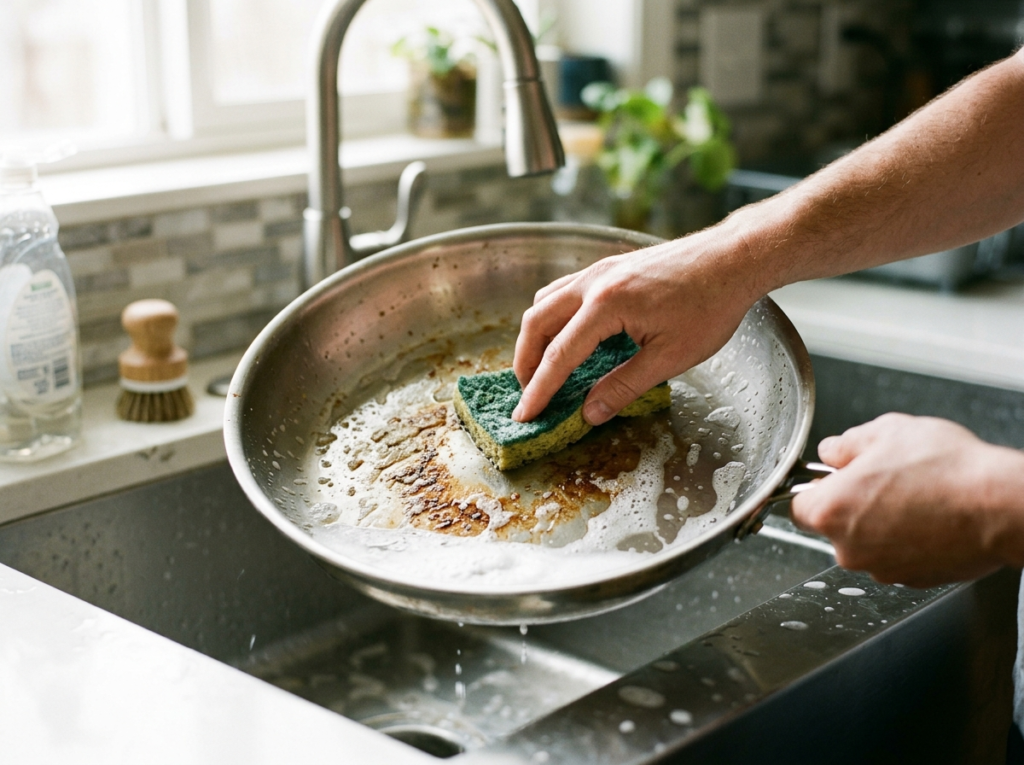
Dinner might take 30 minutes, but a burnt pan can steal the rest of your evening. If you hate doing dishes, you’re not lazy and you’re definitely not alone. The good news is that you don’t need fancy cleaners or endless scrubbing to get your pots and pans clean.
Most messes come down to heat, grease, and timing. Once you know which one you’re dealing with, cleanup gets much easier. These four tips will help you clean faster, protect your cookware, and stop treating every dirty pan like it needs a full rescue mission.
2. Why it’s hard to get your pots and pans clean
Heat turns food into glue
Ever notice how oatmeal, eggs, tomato sauce, and burnt rice all stick in different ways? That’s because food changes once heat gets involved.
Starch dries into a crust. Sugar turns sticky, then hard. Protein grabs onto the pan. Oil can bake onto metal like a thin coat of clear paint. That’s why one skillet wipes out in seconds while another looks like it survived a campfire.
Grease is its own problem too. Hot water alone won’t do much if the mess is oily. Grease needs soap to break it up. Burnt bits need time, heat, or gentle scrubbing. A lot of people use the wrong fix for the wrong mess, then wonder why the pan still looks awful.
Waiting makes the job worse
The biggest mistake is simple: waiting too long.
A warm pan still has soft residue. A cold pan has dried, hardened residue. The difference can be ten easy wipes versus ten frustrating minutes. If you leave a pot overnight with dried sauce on the sides, you’re asking tomorrow-you to work much harder than tonight-you had to.
That doesn’t mean you need to wash everything the second dinner ends. You just need a smart first move while the pan is still warm.
Quick facts
- Grease needs soap, not just hot water.
- Burnt starch loosens faster with heat and soaking.
- Cast iron hates long soaking more than it hates a little soap.
- Rainbow stains on stainless steel usually come from heat, not dirt.
3. Tip 1: Soak smart to get your pots and pans clean
The 10-minute soak that actually works
A good soak is short, warm, and targeted.
As soon as you plate dinner, pour off any extra grease. Don’t send hot grease down the drain. Let it cool in a jar or wipe small amounts out with a paper towel first. Then add hot water and a few drops of dish soap to the pan and let it sit for about 10 to 15 minutes.
That’s often enough for pasta sauce, rice, oatmeal, or a pan that has a light brown film after sautéing. By the time you come back, a sponge or nylon brush can usually lift the mess without a fight.
You don’t need to fill the whole sink, either. Just add enough water to cover the stuck area. That saves water and gets the job done faster.
A real-life example helps here. Say you made mac and cheese in a saucepan and the cheese dried around the edges. If you leave that pan dry on the stove, it turns into a crusty ring. If you add hot soapy water right after serving, most of that mess softens before you even sit down.
If your sink area always feels chaotic, a few ideas from how a pro chef organizes a small home kitchen can make cleanup feel smaller before you start. A brush within reach matters more than people think.
When soaking makes things worse
Not every pan likes a soak.
Raw cast iron and carbon steel should not sit in water for long. They can rust fast, and long soaking can weaken the seasoning that helps food release. A brief rinse is fine. An overnight bath is not.
Very hot pans also shouldn’t go straight under cold water. That fast temperature change can warp metal and, in some cases, crack enamel.
Cold soaking can also waste your time if the mess is mostly grease. You’ll come back to oily water and a slippery sponge. In that case, dish soap plus warm water works much better than plain water.
Pro Tip: Keep a nylon scraper or soft dish brush near the sink. It beats using your nails or reaching for steel wool out of frustration.
4. Tip 2: Use heat and steam before you scrub
The simmer trick for stainless steel and enamel
If soaking didn’t do enough, don’t jump straight to brute force. Use heat.
For stainless steel or enameled cookware, add a shallow layer of water to the pan with a drop or two of dish soap. Put it back on the stove and bring it to a gentle simmer for a few minutes. Then use a wooden spoon or silicone spatula to scrape up the loosened bits.
This works because warm water and steam get under the stuck layer and lift it off the surface. It’s the same reason baked-on oatmeal often comes off better after reheating water in the pot.
Here’s a simple version:
- Add enough water to cover the stuck food.
- Add a little dish soap.
- Simmer for 3 to 5 minutes.
- Turn off the heat and scrape gently.
- Let the pan cool a bit, then wash normally.
That trick is extra useful after searing meat. The brown bits left behind are called fond. In cooking, deglazing means adding liquid to a warm pan to loosen that flavor-packed layer. It builds better sauces and cuts cleanup time too. You’ll see that same practical thinking in these chef’s tricks of the trade.
The gentle version for nonstick
Nonstick pans need a softer touch.
If food sticks in a nonstick skillet, fill it with warm water and dish soap first. If the mess is stubborn, you can warm the pan very gently with that water inside for a minute or two, then turn off the heat and let it sit. Use a soft sponge after that.
Don’t boil a nonstick pan hard. Don’t use metal scrubbers. Don’t attack it with a knife or metal spatula. The coating is doing important work, and once it gets scratched or starts flaking, the pan is on borrowed time.
A sticky egg pan is a good example. Many people think, “This pan is ruined.” Often it isn’t. The problem is just cooked protein plus heat. Warm soapy water and a soft sponge usually solve it.
Warning: Never pour cold water into a screaming-hot pan. That can warp stainless steel, damage nonstick coatings over time, or crack enamel.
5. Tip 3: Match the cleaner to the pan material
One big reason cleanup feels miserable is that people use the same method on every pan. Your cookware doesn’t all want the same treatment.
Stainless steel
Stainless steel is tough, but it still has preferences.
For daily grease and food residue, use dish soap and a sponge or nylon scrubber. For brown spots or cooked-on film, make a paste of baking soda and water and rub gently. For rainbow heat marks or white hard-water spots, white vinegar often helps. Just dampen a cloth with vinegar, wipe the area, then rinse and dry.
If the pan has stubborn stains on the bottom, a stainless-safe cleaner can help. Many home cooks use products like Bar Keepers Friend for this job. Just check the label and scrub with a non-scratch pad.
What you should skip? Bleach, very harsh abrasive powders, or random internet hacks that treat every stain like a chemistry experiment.
Did you know? The popular baking soda plus vinegar trick looks powerful because it fizzes. The fizz is fun, but it’s not magic. For grease, soap does more. For burnt residue, a baking soda paste or simmering water usually works better than making foam.
Nonstick and ceramic
Nonstick and ceramic-coated pans need patience more than power.
Use warm water, dish soap, and a soft sponge. If grease has baked onto the surface, let the pan soak briefly in hot soapy water. You can use a little baking soda on some pans, but do it gently and not all the time. Too much abrasion can dull the surface over time.
Avoid steel wool, harsh scouring powders, and rough scrub pads. Also be careful with aerosol cooking sprays. They often leave behind a sticky film that builds up and makes the pan feel less slick later.
If your nonstick pan now sticks more than it used to, the issue may not be dirt at all. The coating may simply be wearing out. Deep scratches, peeling, or flaking are signs it’s time to replace the pan.
Cast iron and enameled cast iron
Cast iron scares a lot of people, mostly because there’s so much bad advice floating around.
Here’s the simple version: a small amount of dish soap won’t ruin a well-seasoned cast iron pan. Long soaking, leaving it wet, or putting it in the dishwasher is the bigger problem.
To clean raw cast iron, rinse it with hot water, use a brush or scraper, and dry it right away. If food is really stuck, add a little coarse salt or use a pan scraper. Once it’s dry, wipe on a very thin layer of oil if the surface looks dry.
Seasoning is that baked-on layer of oil that protects the pan and helps food release. Think of it like a built-up shield, not a fragile coating that disappears if soap gets near it for ten seconds.
Enameled cast iron is different. It has a glass-like enamel layer, so you can use warm soapy water. Just avoid metal scrubbers and sudden temperature changes.
If you cook often with heavy skillets or Dutch ovens, you might enjoy this piece on the cast iron conundrum: Le Creuset or Lodge. Material matters a lot more than brand loyalty during cleanup.
Aluminum and copper
Bare aluminum can discolor with harsh detergents and dishwasher cycles. Mild soap and a soft sponge are the safer bet. Some aluminum pans are anodized, which makes them tougher, but it’s still smart to avoid aggressive scrubbing.
Copper cookware usually needs gentle cleaning too, especially if you care about the shine. Mild dish soap works for daily cleaning. If the outside tarnishes, use a copper cleaner made for that finish, or follow the maker’s care guide.
If a pan is valuable or has a special lining, the manufacturer’s instructions win every time. A five-minute check can save a very expensive mistake.
6. Tip 4: Stop the next mess before it sticks
Clean as you cook
The easiest pan to clean is the one you never let crust over.
Pros do this almost without thinking. They scrape, soak, wipe, and reset while food cooks. You don’t need to run a restaurant kitchen to borrow that habit.
After sautéing vegetables, wipe the stove splatter before it dries. Once pasta goes into bowls, fill the empty pot with hot water. After searing chicken in stainless steel, deglaze the pan for sauce instead of leaving that browned layer to harden. Small moves like that save a ton of scrubbing later.
A few of the best home-kitchen habits line up with these private chef pro tips. The idea is simple: keep the mess moving, not sitting.
There’s another side benefit too. A cleaner workspace makes you calmer. You’re less likely to stack dirty pans, knock utensils into the sink, or let grease spread from one item to the next.
Use the right heat and a little patience
A lot of sticky mess starts before the food even lands in the pan.
Too much heat can bake oil onto the surface and leave a stubborn brown film. Too little heat on stainless steel can make proteins grab on harder. Moving food too early can tear it and glue it to the pan.
A few examples:
- Eggs do best in a nonstick skillet over low to medium heat.
- Chicken or steak in stainless steel needs a properly heated pan and enough fat. If it sticks at first, give it a moment. It often releases once a crust forms.
- Sugary sauces need attention. Leave them too long and they become glue.
One small habit many cooks miss: avoid using more oil than you need. Excess oil can splatter, burn, and leave a sticky layer on the pan’s outside and bottom.
If cleanup decides what you cook on busy nights, using tools that cut down on dirty cookware helps too. Meals built around an air fryer can mean fewer pots, fewer pans, and less time at the sink.
7. What not to do if you want cookware to last
Tools and shortcuts that cause damage
Some cleaning shortcuts save two minutes and cost you a pan.
Skip these if you can:
- Steel wool on nonstick or enamel
- Metal utensils used as scrapers
- Long vinegar soaks on cast iron
- Dishwasher cycles for raw cast iron
- Harsh cleaner mixes, especially bleach with vinegar or ammonia
Mixing household cleaners is never worth it. The fumes can be dangerous, and most cookware messes don’t need that kind of force anyway.
Also be careful with “magic” hacks from social media. Dishwasher tablets boiled in a pan, aggressive oven cleaners, or random powdered products can damage finishes fast.
Stains that look bad but aren’t always damage
Not every ugly pan is ruined.
A rainbow sheen on stainless steel is usually just heat tint. Vinegar often removes it.
A white chalky film is often mineral residue from hard water.
A dark surface on cast iron can be healthy seasoning.
A tan stain inside enameled cookware may just be cooked-on residue, not permanent damage.
Real damage looks different. If your nonstick coating is peeling, if the base is warped so badly it spins on the stove, or if enamel has chipped badly on the cooking surface, the pan may be past its prime.
So before you toss a pan in frustration, ask one question: is this dirt, stain, or damage? A lot of cookware gets thrown out when it only needed the right cleaning method.
8. FAQ Section
What is the fastest way to clean a burnt pot or pan?
The fastest method depends on the pan material. For stainless steel or enameled cookware, add water and a little dish soap, then simmer it for 3 to 5 minutes. That loosens burnt food so you can scrape it gently. For nonstick, use hot soapy water and a soft sponge after a short soak. For cast iron, skip soaking and use hot water, a scraper, then dry it right away.
Can I use baking soda and vinegar on all pots and pans?
No. Baking soda is usually safe for stainless steel and many enameled surfaces, but it can be too abrasive for frequent use on nonstick. Vinegar works well on stainless steel for heat marks and mineral spots, but long vinegar soaks can hurt cast iron seasoning. Use them for the right job, and don’t treat them like a one-size-fits-all fix.
Is dish soap safe for cast iron?
Yes, a small amount of dish soap is generally safe for modern, well-seasoned cast iron. The bigger risk is soaking cast iron for too long or letting it stay wet. Wash it quickly, dry it right away, and rub on a thin layer of oil if needed. That keeps rust away and helps the seasoning stay strong.
What’s the safest scrubber for nonstick pans?
Use a soft sponge, dishcloth, or non-scratch nylon scrubber. Avoid steel wool, metal scrapers, and rough scouring pads. If food is badly stuck, let the pan soak in hot soapy water first so the residue softens before you touch it with a scrubber.
Should I put my pots and pans in the dishwasher?
Some cookware says it’s dishwasher-safe, but hand washing is usually better for long life. Dishwashers can dull aluminum, weaken nonstick coatings over time, and ruin raw cast iron. If you want pans to stay looking and performing their best, a quick hand wash is usually the smarter move.
9. Conclusion
You don’t need more elbow grease. You need a better plan.
Start with the easy win tonight: after dinner, put your dirtiest pan in hot soapy water while it’s still warm. If that doesn’t do the trick, use the simmer method or match the cleaner to the pan material instead of scrubbing harder.
That one shift can save your cookware, your time, and your mood. And once cleanup stops feeling like a punishment, cooking gets a lot more fun again.