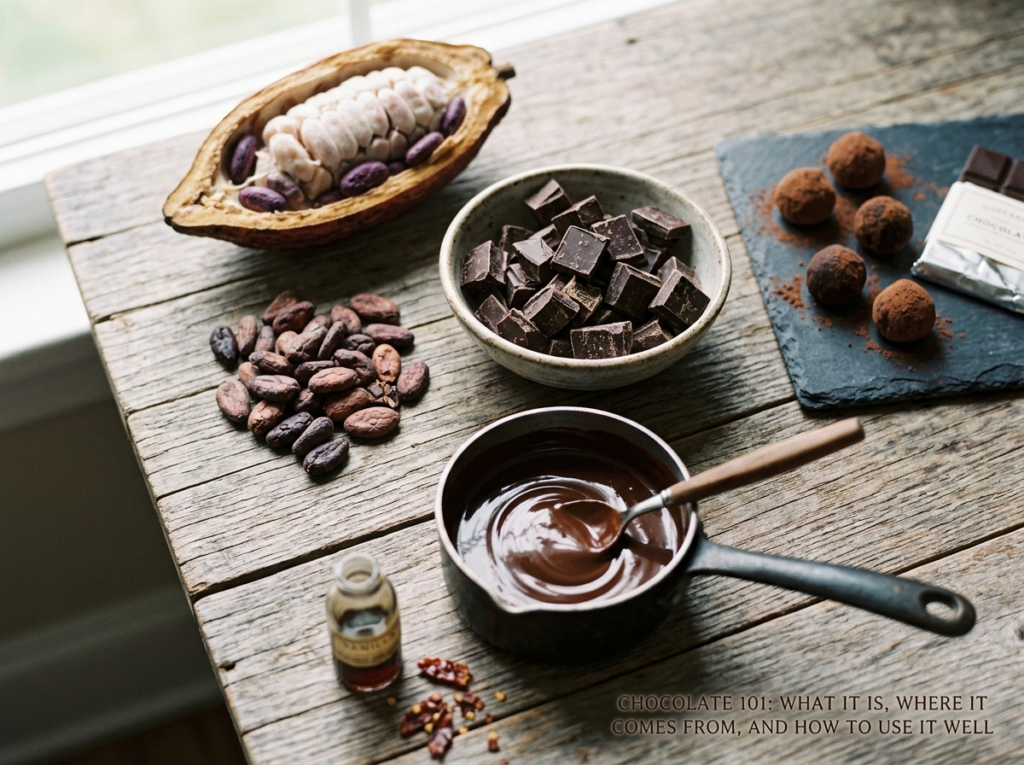
Over 7.5 million tons of chocolate get consumed around the world every single year. That’s roughly a kilogram for every person on the planet. And yet, most of us couldn’t explain the difference between cacao and cocoa if someone put a bar to our head.
Here’s the thing — chocolate is one of those ingredients we all think we know. You’ve eaten it in candy bars, baked with it, maybe even sipped it as hot cocoa on a cold night. But there’s a huge gap between eating chocolate and actually understanding it. Knowing where it comes from, what separates a $2 bar from a $12 bar, why tempering matters, and how the type of chocolate you pick can completely change a recipe — that knowledge turns you from someone who just eats chocolate into someone who really uses it.
This guide breaks the whole thing down. We’ll walk through the journey from cacao tree to finished bar, talk about the different types of chocolate you’ll run into, and — most importantly — cover how to work with chocolate in your own kitchen without making a mess of it.
The Cacao Tree: Where All Chocolate Begins
Chocolate starts with a tree. Specifically, the Theobroma cacao tree, which translates from Greek as “food of the gods.” That name wasn’t accidental — ancient Mesoamerican civilizations considered cacao sacred.
These trees grow exclusively within a narrow band around the equator, roughly 20 degrees north and south. They’re picky plants. They need consistent humidity, rainfall, shade from taller trees, and temperatures that rarely dip below 60°F. You won’t find cacao growing in France or California. Think West Africa, Central and South America, and parts of Southeast Asia instead.
About 70% of the world’s cacao comes from West Africa, with Ivory Coast and Ghana leading production. But some of the most prized cacao — the beans chocolate makers get genuinely excited about — grows in places like Ecuador, Venezuela, Madagascar, and the Dominican Republic.
The fruit of the cacao tree is called a pod. It’s about the size of a small football, with a hard, colorful shell that ranges from deep purple to bright yellow. Crack one open and you’ll find 30 to 50 cacao beans surrounded by a sweet, white, mucilaginous pulp. Those beans, and what happens to them next, determine everything about the chocolate you’ll eventually taste.
The Three Main Cacao Varieties
Not all cacao is the same. There are three primary types, and understanding them helps explain why chocolate can taste so wildly different from one bar to the next.
Forastero accounts for roughly 80–85% of global production. It’s hardy, disease-resistant, and produces a strong, straightforward chocolate flavor. Most mass-market chocolate comes from Forastero beans.
Criollo is the rarest variety — maybe 5% of world production. The beans are more delicate, the trees more susceptible to disease, but the flavor? Complex, nuanced, often with fruity or floral notes. It’s the variety that craft chocolate makers dream about.
Trinitario is a natural hybrid of the two, born in Trinidad after a disease wiped out local Criollo crops in the 1700s. It carries some of Criollo’s complexity with Forastero’s resilience. Many premium chocolates use Trinitario beans.
From Bean to Bar: How Chocolate Gets Made
The journey from raw cacao bean to the smooth chocolate you know involves several steps, and each one matters. Skip or rush any of them and you’ll taste the difference.
Fermentation and Drying
Right after harvest, farmers scoop the beans and their surrounding pulp into wooden boxes or banana-leaf-covered piles. The pulp ferments over three to seven days, and during this process, the beans undergo chemical changes that develop their flavor precursors. Without fermentation, chocolate would taste flat, bitter, and astringent — nothing like what you’d want to eat.
After fermentation, the beans get spread out to dry in the sun for about a week. Proper drying prevents mold and locks in those flavor compounds. At this point, the beans are bagged and shipped to chocolate makers around the world.
Roasting, Cracking, and Winnowing
Roasting is where a chocolate maker’s craft really shows up. Time and temperature vary depending on the bean’s origin, variety, and the flavor profile the maker wants. A longer, lower roast might bring out caramel and nutty notes. A shorter, hotter roast might preserve bright, fruity acidity.
After roasting, the beans are cracked open and the shells are removed — a process called winnowing. What’s left are cacao nibs: small, crunchy pieces of pure roasted cacao. You can actually eat these on their own. They’re intensely bitter, earthy, and almost coffee-like.
Grinding and Conching
The nibs get ground down, and because cacao beans contain about 50% fat (cocoa butter), the friction and heat of grinding transforms them into a thick, flowing liquid called chocolate liquor — despite containing zero alcohol.
From here, the liquid goes through conching, a process invented by Rodolphe Lindt in Switzerland in 1879. A conche is essentially a machine that continuously stirs, aerates, and heats the chocolate for hours — sometimes days. This smooths out the texture, removes volatile acids that cause harsh flavors, and develops the chocolate’s final taste. Cheap chocolate might get conched for a few hours. High-quality chocolate can spend 72 hours or more in the conche.
After conching, manufacturers add sugar, extra cocoa butter, milk powder (for milk chocolate), vanilla, and sometimes a tiny amount of lecithin as an emulsifier. The exact recipe varies by maker and style.
Types of Chocolate: Know What You’re Working With
Walk into any grocery store and you’ll see dark, milk, white, bittersweet, semisweet, and probably a few other labels on chocolate bars. These aren’t just marketing terms — they refer to actual differences in composition. And if you’re cooking or baking, picking the wrong one can throw your whole recipe off.
Dark Chocolate
Dark chocolate contains cacao solids, cocoa butter, and sugar. No milk. The percentage you see on the label — 60%, 72%, 85% — tells you how much of the bar is actual cacao (solids plus butter combined). A higher percentage means more cacao flavor and less sweetness.
For eating, most people enjoy dark chocolate somewhere in the 60–75% range. Go above 85% and it gets seriously bitter — still wonderful if you like that intensity, but not for everyone.
For baking, dark chocolate in the 60–70% range tends to be the sweet spot. It gives you strong chocolate flavor without overpowering sweetness or bitterness.
Milk Chocolate
Milk chocolate adds milk powder (or condensed milk) to the mix, along with more sugar. By FDA standards in the United States, milk chocolate must contain at least 10% cacao solids. Most commercial milk chocolate hovers around 30–40% cacao.
The result is sweeter, creamier, and milder. It melts at a lower temperature than dark chocolate because of the milk fats, which is worth keeping in mind if you’re using it in baking. Milk chocolate can be tricky to work with — it’s more prone to seizing and scorching.
White Chocolate
Let’s get this out of the way: yes, white chocolate is “real” chocolate, at least by most regulatory definitions. It’s made from cocoa butter, sugar, and milk solids. What it doesn’t contain is cacao solids, which is why it’s white and doesn’t taste like traditional chocolate.
Good white chocolate should taste buttery and creamy with subtle vanilla notes. Bad white chocolate — and there’s plenty of it — tastes waxy and cloyingly sweet, often because manufacturers substitute vegetable fats for cocoa butter. Check the ingredients. If it says “cocoa butter” as a primary fat, you’re in good shape.
Unsweetened (Baker’s) Chocolate
This is pure chocolate liquor, solidified. No sugar, no milk, no nothing — just ground cacao. It’s extremely bitter on its own and isn’t meant for snacking. Recipes that call for unsweetened chocolate typically add their own sugar, giving the baker full control over sweetness.
Cocoa Powder
Cocoa powder is made by pressing most of the cocoa butter out of chocolate liquor, then grinding what’s left into a fine powder. There are two types:
Natural cocoa powder is acidic, with a pH around 5. It’s lighter in color, has a sharper chocolate flavor, and reacts with baking soda (an alkaline leavener) to help baked goods rise.
Dutch-processed cocoa powder has been treated with an alkalizing agent to neutralize its acidity. It’s darker, smoother, and mellower in flavor. It doesn’t react with baking soda the same way, so recipes using Dutch-process cocoa typically call for baking powder instead.
Pro Tip: Don’t swap natural and Dutch-process cocoa in recipes without adjusting the leavening. It’s not just a flavor difference — it’s a chemistry difference. Your brownies or cake might come out flat or weirdly puffed if you get it wrong.
Cacao vs. Cocoa: Is There Actually a Difference?
You’ve probably noticed both words showing up on packaging and in recipes. They come from the same bean, but they aren’t quite the same thing.
Cacao generally refers to products that are raw or minimally processed — cacao nibs, cacao powder (made without high heat), and cacao butter. The idea is that less processing preserves more of the bean’s natural antioxidants and nutrients.
Cocoa typically refers to products that have been roasted and further processed. Cocoa powder, cocoa butter used in chocolate making — these have been through the standard manufacturing process.
In everyday cooking, the practical difference matters most with powders. Raw cacao powder has a slightly different flavor (more earthy, less smooth) and hasn’t had its acidity modified. For baking, regular cocoa powder — natural or Dutch-processed — is usually what recipes are built around. Save raw cacao for smoothies, energy bites, or situations where you aren’t relying on precise chemical reactions.
How to Cook and Bake With Chocolate (Without Ruining It)
Chocolate is surprisingly temperamental in the kitchen. It doesn’t like water. It doesn’t like high heat. It has opinions about how it’s stored. Respect those quirks and you’ll get beautiful results. Ignore them and you’ll end up with a grainy, seized, or bloomed mess.
Melting Chocolate the Right Way
You’ve got two reliable options: a double boiler or a microwave. Both work well, but both have pitfalls.
Double boiler method: Set a heatproof bowl over a pot of barely simmering water. The bowl shouldn’t touch the water. Chop your chocolate into small, even pieces and stir gently as it melts. The key word here is gentle. Chocolate scorches easily. Dark chocolate should be melted around 115–120°F (46–49°C). Milk and white chocolate are even more sensitive — keep them under 110°F (43°C).
Microwave method: Put chopped chocolate in a dry, microwave-safe bowl. Heat in 20-to-30-second bursts, stirring between each one. Chocolate holds its shape in the microwave even after it’s technically melted, so don’t judge by looks alone — stir it and check. Most people who scorch chocolate in the microwave do so because they nuke it for two minutes straight and walk away.
Warning: Even a tiny drop of water can make melted chocolate “seize” — that’s when it suddenly turns into a thick, grainy clump. Keep your bowls, spatulas, and hands completely dry. If your chocolate does seize, you can sometimes save it by stirring in a tablespoon of warm cream or vegetable oil. It won’t be ideal for tempering after that, but it’ll work fine in a ganache or batter.
Tempering: When and Why It Matters
If you’re dipping strawberries, making chocolate truffles, or creating any confection where the chocolate needs to have a glossy finish and a satisfying snap, you need to temper it. Tempering is the process of carefully heating, cooling, and reheating chocolate to stabilize the cocoa butter crystals into a specific structure (Form V, if you want to get technical about it).
Untempered melted chocolate sets up dull, soft, and often develops a whitish “bloom” on the surface. It’s still safe to eat — it just doesn’t look or feel professional.
The classic tabletop method involves melting chocolate to about 115°F, pouring two-thirds onto a marble slab, spreading and folding it until it cools to around 80°F, then mixing it back with the remaining warm chocolate to bring the whole batch to a working temperature of 88–90°F for dark chocolate (a few degrees lower for milk and white). It takes practice, a thermometer, and patience.
If that sounds intimidating, there’s a simpler approach called the “seed method.” Melt two-thirds of your chocolate, then stir in finely chopped, already-tempered chocolate (like pieces from a bar) until the temperature drops to the right range. The existing crystals in the chopped pieces “seed” the melted chocolate with the correct crystal structure.
You probably don’t need to temper chocolate for brownies, cakes, or sauces. But for candy-making, coated treats, and decorative work, it’s a skill worth building.
Pairing Chocolate With Other Flavors
Chocolate is incredibly versatile. It plays well with flavors you’d expect — vanilla, caramel, coffee, peanut butter — and also with ones that might surprise you.
Salt isn’t just a trendy addition. A pinch of flaky sea salt on dark chocolate intensifies the sweetness and rounds out bitterness. This is basic flavor science — salt suppresses bitter taste receptors, letting other flavors come through more clearly.
Citrus cuts through chocolate’s richness. Orange zest in a dark chocolate ganache is a classic French combination for good reason. Lemon works too, especially with milk chocolate.
Spice has been paired with chocolate for centuries. The ancient Maya and Aztecs drank chocolate with chili peppers long before sugar was ever involved. Try a pinch of cayenne in hot chocolate, or add cinnamon and a touch of ancho chili to a mole-inspired dish with Mexican culinary roots. The heat hits a moment after the chocolate, creating this beautiful layered flavor experience.
Cheese is an underrated partner. A piece of sharp aged cheddar with dark chocolate is surprisingly wonderful. Some European cheese courses include chocolate as a pairing element alongside fruit and nuts.
Did You Know? Chocolate and olive oil together make an incredibly fudgy cake. The oil keeps the crumb moist for days. It’s a trick Italian bakers have used for generations — and it happens to be naturally dairy-free.
Storing Chocolate So It Doesn’t Go Wrong
Chocolate doesn’t expire quickly, but it does degrade if you treat it carelessly. Two things to avoid: heat and moisture.
Store chocolate in a cool, dry place — ideally between 60–68°F (15–20°C). A kitchen cupboard away from the oven or stove works fine. Don’t refrigerate chocolate unless you absolutely have to (like during a summer heatwave with no air conditioning). The fridge introduces moisture and causes chocolate to absorb odors from whatever else is in there. Nobody wants their chocolate tasting faintly of last night’s garlic chicken.
If you do refrigerate it, wrap it tightly in plastic and then put it in a zip-top bag. When you take it out, let it come to room temperature while still wrapped. This prevents condensation from forming on the surface.
That white film you sometimes see on older chocolate? It’s called bloom, and it comes in two forms. Fat bloom happens when cocoa butter migrates to the surface, usually because of temperature fluctuations. Sugar bloom happens when moisture dissolves surface sugar, which then recrystallizes. Neither type is harmful. The chocolate might look less appetizing and the texture might be slightly off, but it’s perfectly safe to eat or use in baking.
Dark chocolate, stored properly, keeps its quality for about two years. Milk and white chocolate are best used within a year because the milk solids can go stale.
Chocolate in Savory Cooking: Don’t Be Afraid of It
Most people think of chocolate as strictly a dessert ingredient. That’s a very modern, very Western perspective. For most of chocolate’s 4,000-year history, it was consumed as a bitter, savory, or spiced drink — not a sweet treat.
Mexican mole sauces are the most famous example of chocolate in savory cooking. A complex mole negro might contain dried chili peppers, nuts, spices, and a piece of dark chocolate that ties everything together with depth and body. The chocolate doesn’t make the sauce taste like dessert — it makes it taste richer.
You can apply this principle at home. A tablespoon of cocoa powder stirred into a beef chili adds an earthy depth that people will notice but probably can’t identify. A square of dark chocolate melted into a red wine pan sauce for steak creates a velvety, complex finish. Even a hearty braised meat dish benefits from a little chocolate stirred in at the end.
The trick is restraint. You want chocolate as a background player, not the star. Think of it the way you’d think of adding soy sauce or fish sauce to a dish that isn’t Asian — just a little, for depth and umami, not enough to dominate.
Choosing Quality Chocolate: What to Look For
Not all chocolate is created equal, and price alone doesn’t always tell you what you need to know. Here’s what to pay attention to.
Read the ingredients. Good chocolate has a short ingredients list: cacao (in some form), cocoa butter, sugar, maybe vanilla, maybe lecithin. If vegetable oils, artificial flavors, or “chocolatey” appear on the label, you’re not getting real chocolate.
Check the cacao percentage. This tells you the ratio of cacao to everything else. For eating, your preference is personal. For cooking and baking, match the percentage to what the recipe calls for. Substituting 85% dark chocolate in a recipe that was developed with 60% will give you something significantly more bitter and less sweet.
Look for origin information. Single-origin chocolates — those made from beans from one specific country or region — tend to have more distinctive flavor profiles. Ecuadorian cacao often has floral, jasmine-like notes. Madagascan cacao can be bright and citrusy. Ghanaian cacao tends to be classic, robust, and earthy. This is similar to how wine grapes reflect their terroir. The soil, climate, and processing all leave their mark.
Trust your senses. Good dark chocolate should snap cleanly when you break it. It should have a glossy surface (assuming it’s been properly tempered). The aroma should be complex — you might pick up fruit, nuts, earth, or flowers. On the palate, it should melt smoothly without a gritty or waxy feeling.
A few brands worth trying if you want to explore: Valrhona and Callebaut are professional-grade favorites used by pastry chefs worldwide. For craft bars, look at Dandelion Chocolate, Ritual Chocolate, or Soma Chocolatemaker. For everyday baking, Guittard and Ghirardelli are solid, widely available options that won’t break the bank.
Quick Notes on Chocolate and Health
Chocolate’s health reputation has been on a rollercoaster for decades. The truth, as usual, is somewhere in the middle.
Dark chocolate with a high cacao percentage does contain meaningful amounts of flavonoids — antioxidant compounds linked to cardiovascular benefits in some studies. A 2022 review published in the European Journal of Preventive Cardiology found that moderate dark chocolate consumption was associated with a small reduction in heart disease risk. But “moderate” is a key word. We’re talking about an ounce or so a few times a week, not half a bar every night.
Chocolate also contains theobromine (a mild stimulant related to caffeine), magnesium, iron, and some fiber. These are real nutritional upsides. But chocolate also contains sugar and saturated fat, especially milk and white varieties.
The bottom line? Enjoy chocolate. Pick dark varieties with higher cacao percentages if health is a priority. Don’t eat it like medicine and don’t feel guilty about it as a treat. If you’re the kind of person who organizes your kitchen thoughtfully, keep a bar of good dark chocolate in the pantry. It’s useful for cooking, great for snacking, and good for the soul — even if science is still sorting out the specifics.
FAQ
What’s the difference between bittersweet and semisweet chocolate?
Honestly? The line is blurry. The FDA doesn’t define a hard boundary between them. Both fall under the “dark chocolate” umbrella. Traditionally, bittersweet contains less sugar and a higher cacao percentage (around 65–80%), while semisweet is slightly sweeter (around 50–65%). In most recipes, you can swap one for the other without disaster — just expect a slight shift in sweetness and intensity.
Can I substitute cocoa powder for bar chocolate in recipes (or vice versa)?
You can, but it requires adjustment. A common conversion: for every ounce of unsweetened chocolate, use 3 tablespoons of cocoa powder plus 1 tablespoon of butter or oil. Going the other direction, reduce the fat in the recipe slightly. Keep in mind that cocoa powder and bar chocolate behave differently in batters and doughs, so results won’t be identical. For your best baking outcomes, stick with what the recipe calls for, especially if you’re working with precise techniques like those a trained chef would use.
Why does my melted chocolate sometimes turn thick and grainy?
That’s seizing, and it’s almost always caused by a small amount of moisture getting into the chocolate. Even steam from a double boiler can do it. Ironically, adding more liquid (a tablespoon or two of warm cream, for example) can sometimes bring it back, because chocolate seizes when there’s just enough water to clump the dry particles but not enough to dissolve them. Adding more liquid pushes it past that threshold into a smooth emulsion. It won’t temper properly after that, but it’ll work beautifully in a ganache, frosting, or batter.
Is ruby chocolate a real type of chocolate?
Yes. Ruby chocolate was introduced by Belgian-Swiss company Barry Callebaut in 2017. It’s made from specially selected cacao beans that naturally have a reddish-pink hue and a tart, berry-like flavor. No added colors or fruit flavors. It’s a genuine fourth type alongside dark, milk, and white — though some chocolate purists debate whether the processing method (which is proprietary and undisclosed) qualifies it as its own category.
Does chocolate really go bad?
Chocolate is very shelf-stable due to its low moisture content. It doesn’t “spoil” the way dairy or meat does. What happens over time is that flavors fade, fats can go slightly rancid, and bloom may appear. Dark chocolate stored properly stays good for two years or more. Milk and white chocolate are best within about a year. If it smells fine and tastes fine, it is fine.
Your Next Move With Chocolate
Chocolate is one of those rare ingredients that rewards you the more you learn about it. You don’t need to become a chocolatier or a cacao farmer to appreciate what goes into every bar. But knowing the basics — where it comes from, what the different types actually mean, and how to handle it in the kitchen — changes the way you taste it, cook with it, and shop for it.
Start simple. Next time you’re at the store, pick up two dark chocolate bars from different origins. Taste them side by side. Notice how different they are. Then try melting one into a pan sauce or a batch of brownies and see what happens when you cook with intention instead of just grabbing whatever’s cheapest.
Chocolate has been making people happy for thousands of years. A little knowledge just makes it taste even better.