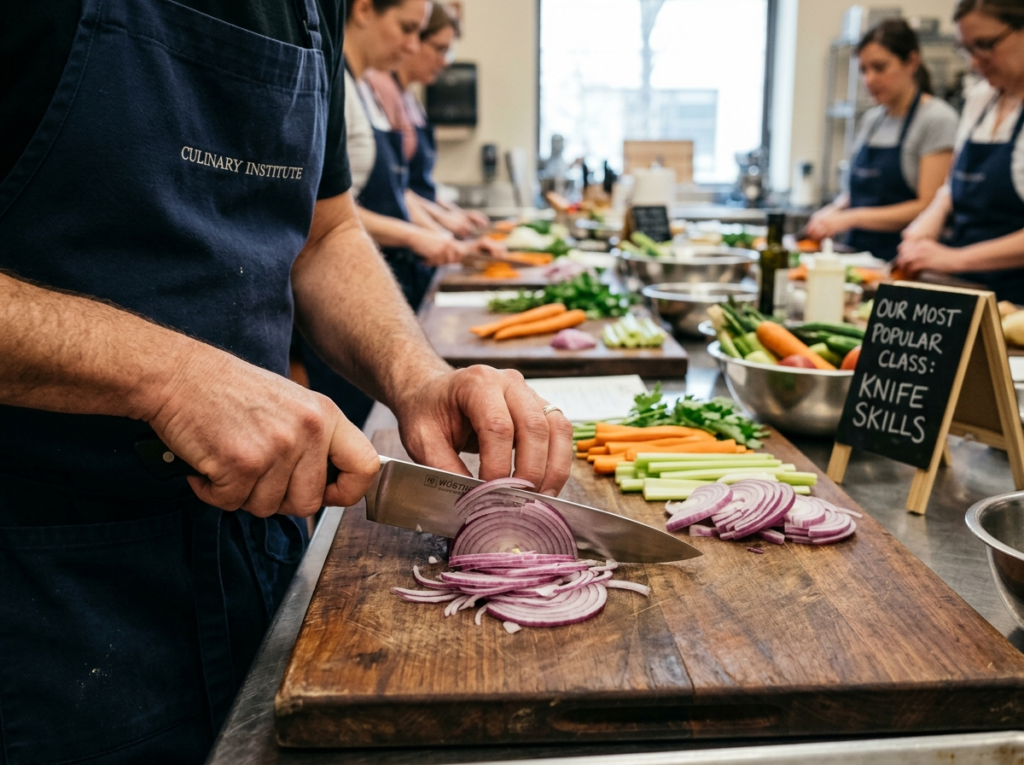
Most people don’t realize they’re using their kitchen knife wrong until they watch a trained chef break down an onion in about eight seconds flat. That moment — the one where your jaw drops a little — is exactly how our knife skills class usually begins.
Out of every class we offer, knife skills fills up first. Every. Single. Time. And honestly, it makes sense. Your knife is the one tool you pick up every time you cook. It doesn’t matter if you’re making a weeknight stir-fry or prepping a holiday feast for twenty people. If you can’t control your knife, everything takes longer, looks rougher, and feels harder than it should.
So what actually happens in a knife skills class? What do people learn that changes the way they cook? And why do students keep telling us it’s the best money they’ve ever spent on their kitchen game? Let’s get into all of it.
Why Knife Skills Matter More Than Any Recipe
Here’s something most home cooks don’t think about: a recipe assumes you already know how to prep. It’ll casually say “finely dice one onion” or “julienne the carrots” like everybody just knows what that means and can do it cleanly. The truth? Most people are guessing.
And that guessing costs you in ways you might not notice. Uneven cuts mean uneven cooking. Those big chunky pieces of garlic burn while the smaller ones disappear. The carrots in your soup are half mush and half crunchy. You spend forty minutes on prep that should take fifteen.
Bad knife habits also put your fingers at real risk. Emergency rooms across the U.S. treat roughly 350,000 knife-related injuries every year, and a huge chunk of those happen in home kitchens. It’s not because people are reckless — it’s because nobody ever showed them the right way to hold a knife or position their guiding hand.
That’s the gap this class fills. It’s not about becoming a chef. It’s about feeling confident and safe every time you pick up your blade.
What You Actually Learn in Our Knife Skills Class
People always ask what the class covers, and I think they expect us to say “we teach you how to chop stuff.” Fair enough — but there’s a lot more going on.
How to Hold Your Knife (Yes, You’re Probably Doing It Wrong)
The very first thing we fix is your grip. Almost every beginner holds the knife with their index finger stretched along the spine of the blade, or they grip the handle like a tennis racket. Both habits kill your control.
We teach the pinch grip — your thumb and index finger pinch the blade right where it meets the handle, and the rest of your fingers wrap around. It feels weird for about five minutes, and then something clicks. You suddenly have control you didn’t know was possible. Students always say the same thing: “Why didn’t anyone tell me this before?”
Your other hand matters just as much. We call it the “claw” position. You tuck your fingertips under, with your knuckles pressed gently against the flat side of the blade. Your knuckles become the guide. Your fingertips stay safe. Once you get this down, your speed naturally increases because you stop being afraid of the knife.
The Cuts That Actually Matter at Home
Culinary school students learn dozens of classical cuts, some of which they’ll never use outside of a professional kitchen. We skip the fancy stuff and focus on the cuts you’ll use three or four times a week.
The rough chop is your everyday workhorse — quick, practical, perfect for soups, stews, and anything that’s going to cook down. The dice (small, medium, and large) gives you even, uniform pieces that cook at the same rate. This one alone transforms your cooking. The mince is what you need for garlic, shallots, ginger, and fresh herbs. And the julienne — those thin matchstick-sized strips — makes your stir-fries and salads look like they came from a restaurant.
We also spend time on the chiffonade, which is just a fancy word for rolling up leafy herbs or greens and slicing them into thin ribbons. It sounds simple, but there’s a technique to it that keeps your basil from bruising and turning black.
Every cut gets demonstrated, practiced, and corrected in real time. That’s the part you can’t get from watching a YouTube video at home. You need someone standing next to you saying, “Relax your shoulder — you’re white-knuckling it.”
Knife Selection: What You Really Need
One of the biggest surprises for students is finding out they don’t need a twelve-piece knife set. Most professional chefs rely on three knives for about 95% of their work: a chef’s knife (8 or 10 inches), a paring knife, and a serrated bread knife.
We spend some time in class talking about blade materials, weight, and balance. A knife that feels perfect in my hand might feel completely wrong in yours, and that’s fine. If you’re thinking about organizing your kitchen around the tools that truly matter, our guide on how a pro chef organizes a small home kitchen covers the essentials beyond just knives.
The bottom line: buy one good chef’s knife, learn to use it well, and learn to keep it sharp. That single investment will outperform any block set gathering dust on your counter.
The Connection Between Knife Skills and Better Cooking
This is the part that really excites me, because it’s where everything comes together.
Once your cuts are even and consistent, your food starts cooking evenly. That sounds obvious, but the impact is dramatic. Your sautéed vegetables actually caramelize instead of steaming in a crowded pan. Your mirepoix (that classic combo of onion, celery, and carrot) breaks down uniformly, giving your soups and sauces a smoother, more professional body.
Presentation improves overnight too. You don’t need to learn elaborate plating techniques — though we do offer tips on that in our piece about simple plating tips for home cooks. Just cutting your ingredients with some intention and consistency makes every dish look more polished.
And here’s something that doesn’t get talked about enough: speed and confidence reduce stress. Cooking stops feeling like a chore when prep doesn’t take forever. You stop dreading the part where you have to break down a butternut squash or slice a pile of peppers. Instead of spending an hour fighting your ingredients before you even turn on the stove, you breeze through and actually enjoy the process.
Some of our students tell us that after the knife skills class, they started cooking at home more often. Not because they learned new recipes — because prep stopped being the bottleneck.
Knife Care: The Skill Nobody Talks About
You can have the best technique in the world, and it won’t matter if your blade is dull. A dull knife is genuinely more dangerous than a sharp one because you have to apply more pressure, which means less control and a higher chance the blade slips off whatever you’re cutting — and into your hand.
Honing vs. Sharpening
Most people mix these up. That long steel rod that came with your knife set? That’s a honing steel, and it doesn’t actually sharpen your blade. It straightens the microscopic edge that bends with regular use. You should be honing your knife every time you use it — literally every time. It takes about fifteen seconds.
Sharpening removes metal to create a new edge. You can use a whetstone (the traditional method that gives the best results), an electric sharpener, or a pull-through sharpener. We recommend whetstones and teach the basic technique in class, but if that feels intimidating, even a simple pull-through sharpener is better than letting your knife go dull for months.
A good rule of thumb: hone every use, sharpen every few months depending on how often you cook.
Storing Your Knives
Tossing your knives into a drawer with your other utensils is a recipe for dull edges and cut fingers. A magnetic wall strip, a knife block, or even blade guards will protect both your knives and your hands. It’s a small thing, but it makes a real difference.
Who Takes This Class (and Why They Come Back)
One thing I love about our knife skills class is how diverse the group always is. We get complete beginners who feel nervous just holding a chef’s knife. We get experienced home cooks who’ve been cooking for decades but know they’ve developed bad habits. We get couples looking for something fun to do together. We even get people who are about to host a big event and want to feel less panicked about the prep work — like those putting together a Thanksgiving spread for the first time.
The age range is all over the place too. We’ve had college students and retirees standing side by side, both learning the same pinch grip for the first time. Knife skills are one of those rare topics where experience level doesn’t create a barrier. Everyone has something to learn, and the class moves at a pace that works for all skill levels.
And a lot of students come back. Not for the same class, but because the confidence they build with a knife makes them hungry (pun intended) to learn more. They sign up for our other cooking classes, try tackling things like making consommé from scratch or working with fresh pasta, or start experimenting with techniques they’d never have attempted before.
That ripple effect is the real reason this class stays our most popular offering.
Practice Drills You Can Do at Home After Class
The class gives you the foundation, but like any physical skill, repetition is what locks it in. Here’s what we tell students to practice during the week after class.
The onion drill. Buy a bag of onions — they’re cheap and they give you great practice. Dice one onion every day for a week using proper technique. By day four or five, you’ll notice a real shift in your speed and confidence. By the end of the week, you won’t even have to think about your hand position anymore.
Herb prep. Grab a bunch of parsley or cilantro and practice your mincing technique. Focus on keeping the tip of your knife anchored to the cutting board and using a rocking motion. Don’t chase speed — chase consistency. Speed follows naturally.
Carrot sticks. Practice your julienne on carrots. They’re firm, they’re forgiving, and they make great snacks when you’re done. Try to get all your matchsticks the same width. It’s harder than it sounds, but incredibly satisfying when you nail it.
Pro tip: Set up your cutting board on a damp towel so it doesn’t slide around. This is something we cover in class, and it’s one of those simple tricks of the trade that professional chefs take for granted but home cooks often miss.
The Gear Question: Do You Need Expensive Equipment?
Short answer: no.
You need a cutting board that’s big enough to work on comfortably. Most home cooks use boards that are way too small, which forces them to crowd their workspace and make awkward cuts. Aim for at least 18 by 12 inches. Wood and plastic both work fine.
You need one quality chef’s knife. Japanese-style knives (like a Santoku or Gyuto) tend to be lighter and sharper out of the box. German-style knives (like those from Wüsthof or Henckels) are a bit heavier and more durable. Neither is “better” — it depends on what feels right in your hand.
And you need a honing steel. That’s really it for the essentials.
Everything else — the paring knife, the bread knife, the boning knife — can come later as you figure out what your cooking style actually demands. Don’t let anyone tell you that you need a $400 knife set before you can cook properly. A single $50–$80 chef’s knife, well maintained, will serve you for years.
What Happens in Your Kitchen After You Take This Class
I’ve watched hundreds of students go through this class over the years, and the pattern is remarkably consistent.
The first week, you’re slow and deliberate. You’re thinking about every grip adjustment, every claw position, every angle of the blade. It feels a little clunky, and that’s perfectly normal. You’re rewriting muscle memory that might be years or decades old.
By week two or three, the mechanics start to smooth out. You stop thinking about where your fingers are and start just… cutting. The knife feels like part of your hand instead of a separate tool you’re operating.
Within a month, people start noticing that their food looks different. The presentation is cleaner. The textures are more consistent. Cooking times get shorter because prep is faster. You start putting your knife skills to the test with recipes you would’ve avoided before — dishes with lots of fresh vegetables, delicate herbs, or intricate garnishes.
And here’s the part that always makes me smile: the people who used to dread cooking start inviting friends over for dinner. Something shifts when you feel capable in the kitchen. It stops being stressful and starts being genuinely fun.
FAQ
Do I need to bring my own knife to the class?
You don’t have to. We provide quality chef’s knives for every student. But if you have a knife at home that you love and want to learn to use better, you’re welcome to bring it. In fact, learning with your own blade can be helpful since you’ll be using that same knife at home.
Is this class safe for someone who’s genuinely scared of knives?
Absolutely. A good portion of our students sign up specifically because they’re nervous around knives and want to fix that. The class is designed to build comfort gradually. We start with grip and positioning before ever making a cut, and instructors work with each student individually to make sure technique is solid before anyone picks up speed.
How long does it take to actually get good at knife skills after taking the class?
Most students feel noticeably more comfortable within a week of consistent practice. Getting truly fast and fluid usually takes a few weeks to a couple of months, depending on how often you cook. The class gives you the correct technique — the repetition at home is what makes it second nature.
What’s the class size, and will I get personal attention?
We keep class sizes small intentionally. The instructor-to-student ratio means everyone gets hands-on correction and feedback. You won’t be standing in the back watching a demonstration on a screen — you’ll be cutting, and someone will be right there helping you improve.
Your Knife Is Waiting
There’s a reason this class has stayed our most popular offering year after year. It’s not flashy. It’s not trendy. It’s the kind of fundamental, practical skill that quietly changes everything about how you cook.
If you’ve been thinking about signing up, stop thinking and just do it. Grab a spot before it fills up — because it will. And if you’re looking for the next step after mastering your blade, check out our private chef pro tips for more ways to level up your kitchen confidence.
Your knife is the most important tool in your kitchen. It’s time you learned to use it like you mean it.