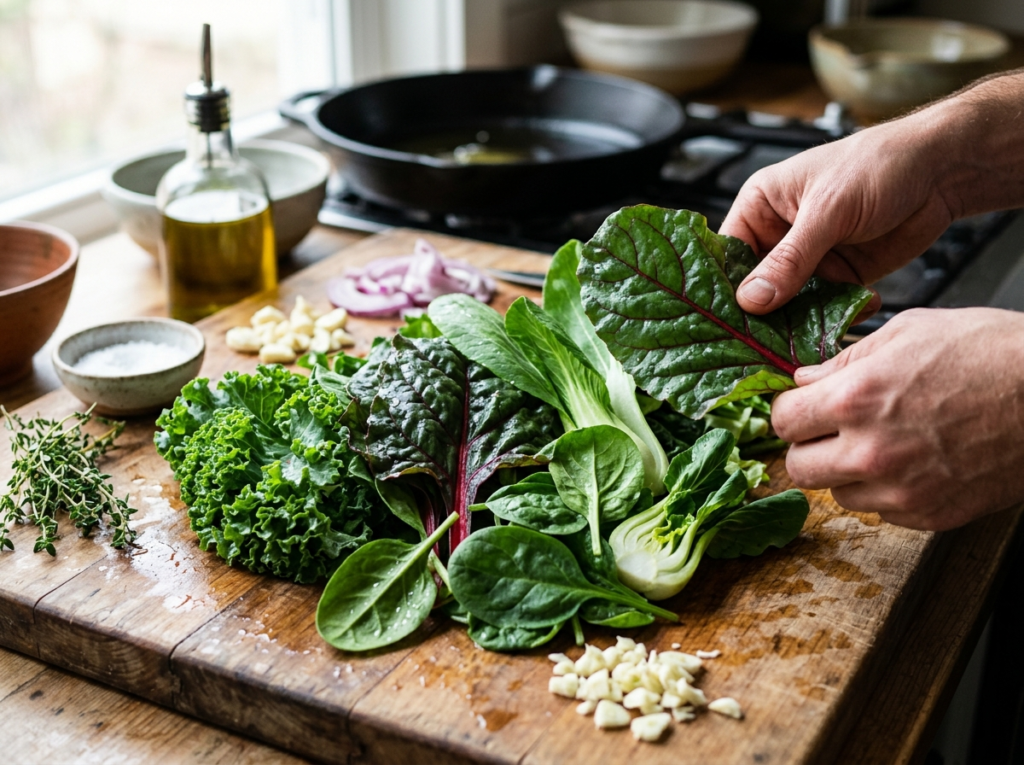
Most people stick to the same two or three leafy greens their whole life. Spinach. Maybe kale if they’re feeling adventurous. That bag of pre-washed arugula sitting in the fridge. But here’s the thing — you’re walking past dozens of perfectly edible, incredibly flavorful leaves every single time you visit a grocery store or farmers’ market. Beet tops, radish greens, carrot fronds, turnip leaves, Swiss chard, mustard greens, collards — they all deserve a spot on your plate. And most of them take less than ten minutes to cook.
The problem isn’t that people don’t want to eat more greens. The problem is nobody ever showed them what to do with all those unfamiliar leaves. You pick up a bunch of dandelion greens, stare at them for a moment, and put them back because you genuinely don’t know where to start. That ends today.
This guide walks you through how to cook virtually every leafy green you’ll encounter — tender ones, tough ones, bitter ones, and even the ones most people throw in the compost bin. You’ll learn which cooking method works best for each type, how to tame bitterness, and a few tricks that professional chefs rely on daily.
Why Most People Get Leafy Greens Wrong
There’s a pattern you see over and over again. Someone buys a beautiful bunch of greens, boils them into a sad, gray mush, tastes it, and swears off that green forever. That’s not the green’s fault — it’s the cooking method.
Each type of leaf has its own personality. Some are delicate and just need a quick flash of heat. Others are tough and fibrous and actually benefit from a longer, slower braise. Treating them all the same way is like cooking a filet mignon and a pork shoulder at the same temperature for the same time. It just won’t work.
The other big mistake? Not seasoning properly. Greens — especially the bitter varieties — need acid and fat to balance them out. A squeeze of lemon, a splash of vinegar, a drizzle of good olive oil, a pinch of red pepper flakes. These aren’t optional. They’re what transform a pile of leaves from something you tolerate into something you actually crave.
Quick fact: According to USDA data, Americans waste roughly 30-40% of the food they buy. Leafy greens are among the most frequently discarded items. Learning to cook them properly — and using parts you’d normally throw away — cuts down on waste significantly.
Understanding the Categories of Leafy Greens
Before you fire up the stove, it helps to think about greens in three broad groups based on their texture and cooking needs.
Tender Greens
These are the soft, thin-leaved greens that cook in seconds. Literally seconds. We’re talking spinach, arugula, watercress, mâche, and young lettuce varieties. If you overcook these, they turn slimy and lose every bit of their charm.
For tender greens, your best bet is either eating them raw in salads or giving them the quickest possible wilt — toss them into a hot pan with a little olive oil and garlic, stir once or twice, and they’re done before you can set a timer. You can also drop them into soups or pasta right at the very end of cooking.
Spinach is the classic example. A massive mountain of raw spinach reduces to about two tablespoons once cooked, which always shocks people the first time. That’s why you need to buy what feels like an absurd amount. Two full bags for a side dish? Totally normal.
Sturdy Greens
This is the middle category — greens that have some body to them but don’t need hours of cooking. Swiss chard, beet greens, bok choy, escarole, and young kale all fall here. They can handle sautéing for several minutes, braising for a short while, or being added to stir-fries and grain bowls.
Swiss chard is a great starting point if you’re new to cooking greens. The stems and the leaves cook at different rates, so here’s a chef’s trick worth knowing: separate the stems from the leaves. Chop the stems and start cooking those first — they need about 3-4 minutes. Then add the torn leaves and cook for another 2-3 minutes. This way, both parts finish perfectly at the same time.
Tough Greens
Collard greens, mature kale, mustard greens, and turnip greens belong in this group. They’re thick, fibrous, and sometimes intensely bitter or peppery. These greens benefit from longer cooking — braising, slow-simmering in stock, or even stewing with smoked meats in the Southern tradition.
Don’t let anyone tell you that long-cooked greens have lost all their nutrients. Yes, some water-soluble vitamins leach out during extended cooking — but you’re often eating them with the cooking liquid (the “pot liquor”), which captures those nutrients. And if the alternative is not eating them at all because you find them too tough raw, well, cooked greens with slightly fewer vitamins still beat no greens at all.
The Core Cooking Methods for Leafy Greens
You don’t need twenty different techniques. Five will cover almost every situation you’ll encounter.
Sautéing — The Everyday Method
This is your workhorse technique for most greens. Heat a wide pan (cast iron works beautifully — and if you need help choosing the right one, that’s a whole conversation of its own). Add olive oil or butter, toss in some sliced garlic, then add your greens. Toss frequently. Season with salt, maybe some red pepper flakes, and finish with a squeeze of lemon.
Sautéing works best for tender and sturdy greens. For tough greens, you’ll want to blanch them first (more on that below), then finish with a sauté to build flavor.
Pro tip: Don’t crowd the pan. If you pile too many greens in at once, they’ll steam instead of sauté, and you’ll miss out on those slightly caramelized edges that make sautéed greens so satisfying.
Blanching and Shocking
This is the restaurant method, and it’s worth adopting at home. Bring a large pot of well-salted water to a rolling boil. Drop your greens in for anywhere from 30 seconds (tender greens) to 2-3 minutes (tough greens). Then immediately transfer them to a bowl of ice water to stop the cooking. Drain, squeeze out the excess water, and you’ve got greens that are bright green, perfectly tender, and ready to be used in anything.
Blanching does something else that’s really useful — it mellows bitterness. If you’ve ever found broccoli rabe, dandelion greens, or mustard greens too harsh, blanching them first takes the edge off dramatically. Some Italian cooks blanch broccoli rabe twice for this exact reason.
Once blanched and shocked, greens keep in the fridge for 2-3 days. So you can prep them on a Sunday and use them throughout the week.
Braising — Low and Slow
For tough greens that need time to become tender, braising is your friend. Think collard greens simmered with smoked ham hock and a splash of apple cider vinegar. Or kale slowly cooked in chicken stock with onions and garlic until it’s silky.
The key to good braised greens is liquid and patience. You want enough stock, water, or cooking liquid to come about halfway up the greens. Bring everything to a simmer, cover loosely, and let time do its thing — anywhere from 30 minutes to over an hour, depending on the green.
Southern-style braised collards are the gold standard here. The greens get impossibly tender, the pot liquor becomes rich and deeply savory, and the whole thing improves when reheated the next day. A splash of hot vinegar sauce at the table ties everything together.
Wilting with Hot Dressing
This old-school technique doesn’t get enough love. You make a warm dressing — usually with bacon fat, olive oil, or another flavorful fat — add some vinegar or citrus, and pour it over raw or barely cooked greens. The heat gently wilts them while the dressing coats every leaf.
Wilted spinach salad with warm bacon vinaigrette is the classic version. But you can do this with arugula, frisée, young dandelion greens, or even watercress. The contrast between the warm dressing and the slightly raw greens creates a texture that’s really special.
Roasting and Crisping
Kale chips became a whole thing about a decade ago, and while the hype has calmed down, roasting greens is still a legitimate and delicious technique. Toss kale, collard green strips, or even Brussels sprout leaves with oil, salt, and whatever spices you like. Spread them on a sheet pan and roast at 375°F (190°C) until crispy at the edges but not burnt.
You can also roast sturdier greens like radicchio or endive. Cut them in half, brush with olive oil, season generously, and roast cut-side down until caramelized. The heat transforms their bitterness into something nutty and sweet. Try it once and you’ll wonder why you didn’t do it sooner.
The Greens Most People Throw Away (But Shouldn’t)
Here’s where things get really interesting. You’re already buying these — you’re just tossing the best part.
Beet Greens
Every time you buy a bunch of beets, you’re also getting a bonus vegetable that most people rip off and throw in the trash. Beet greens taste like a sweeter, earthier version of Swiss chard (they’re actually in the same botanical family). The stems are edible too — just slice them thin and cook them a few minutes longer than the leaves.
Sauté beet greens with garlic and finish with a little balsamic vinegar. Or chop them up and fold them into scrambled eggs. They’re incredibly versatile, and their deep red stems add gorgeous color to any dish.
Carrot Tops
Those feathery green fronds on top of carrots? Completely edible. They taste like a cross between parsley and carrot — which makes sense when you think about it. The texture is a bit too tough for eating raw in large amounts, but they’re perfect for pesto, chimichurri, salsa verde, or blended into soups.
Carrot top pesto is probably the most popular use. Blend the fronds with garlic, Parmesan, toasted nuts (pine nuts or walnuts), olive oil, lemon juice, and salt. Toss it with pasta, spread it on toast, or use it as a sauce for grilled meat.
Radish Greens
Peppery and slightly fuzzy, radish greens aren’t something you’d want to eat raw by the handful. But cook them? Totally different story. A quick sauté or a trip into a soup smooths out their rough texture and lets their spicy, slightly bitter flavor come through in a pleasant way.
Next time you buy a bunch of radishes, try this: sauté the radishes themselves in butter until golden, then add the chopped greens to the same pan for the last couple of minutes. Season with salt and a pinch of sugar. You get two side dishes from one purchase.
Celery Leaves
Most recipes tell you to use the celery stalks and discard the leaves. That’s wasteful advice. Celery leaves are packed with flavor — more intensely celery-flavored than the stalks, actually. Treat them like an herb. Toss them into salads, use them as a garnish for soups and stews, or blend them into smoothies.
If you’re making homemade consommé or any stock-based soup, celery leaves are an excellent addition to your aromatics.
Fennel Fronds
Those wispy, dill-like fronds on top of fennel bulbs taste like mild, sweet anise. They’re beautiful as a garnish and work wonderfully in salads, pasta, or fish dishes. You can also use them to infuse olive oil — just let the fronds steep in warm oil for 20 minutes, strain, and drizzle.
Taming Bitter Greens — Because Not Everyone Loves the Bite
Bitterness is probably the biggest barrier between people and leafy greens. Dandelion greens, broccoli rabe, mustard greens, endive, radicchio, escarole — they all carry some degree of bitterness, and for some people, that’s a dealbreaker.
But bitterness isn’t a flaw. It’s a flavor. And like any flavor, it just needs to be balanced properly.
Fat calms bitterness. Olive oil, butter, bacon fat, cream — any fat will coat your palate and soften the bitter sensation. That’s why sautéing bitter greens in olive oil works so much better than steaming them plain.
Acid redirects bitterness. A squeeze of lemon juice, a splash of red wine vinegar, or a drizzle of balsamic can shift the flavor profile so that bitterness becomes part of a more complex, pleasant taste rather than the dominant note.
Salt suppresses bitterness. This is backed by food science — sodium ions actually block some of the bitter taste receptors on your tongue. So properly salting your greens isn’t just about flavor, it’s about making them palatable.
Heat reduces bitterness. Cooking breaks down some of the bitter compounds in greens. The longer and hotter you cook them, the milder they get. That’s why raw radicchio can taste quite aggressive, but grilled or roasted radicchio is mellow and almost sweet.
Sweetness counterbalances bitterness. A tiny pinch of sugar, a drizzle of honey, some caramelized onions, or dried fruit — any subtle sweetness can bring a dish with bitter greens into harmony. Italian cooks have known this for centuries. Escarole braised with garlic, olive oil, and golden raisins is a classic Sicilian combination that works for exactly this reason. If that Sicilian approach appeals to you, it’s worth exploring further.
Cooking Greens You Might Not Have Considered
Lettuce (Yes, Cooked Lettuce)
The French have been cooking lettuce forever. Braised Little Gem lettuce, grilled romaine hearts, wilted butterhead lettuce in a cream sauce — these are all real dishes, and they’re all delicious. The gentle sweetness of lettuce intensifies when cooked, and the texture becomes silky rather than crispy.
To try it yourself, cut romaine hearts in half lengthwise, brush with olive oil, season with salt and pepper, and grill for about 2 minutes per side. The outer leaves char slightly while the interior stays juicy. Top with a Caesar-style dressing and shaved Parmesan. It’ll change how you think about salad.
Broccoli Leaves
If you grow broccoli or buy it at a farm stand with the leaves still attached, you’re sitting on an underrated green. Broccoli leaves are thick and sturdy, similar to collards, and taste like a milder version of broccoli. Strip the leaves from the thick central rib, chop them, and braise or sauté them just like you would collard greens.
Sweet Potato Leaves
Common in Filipino, Nigerian, and other cuisines around the world, sweet potato leaves are tender, slightly sweet, and mucilaginous (a bit slippery, like okra). They’re excellent in stir-fries, soups, and stews. If you grow sweet potatoes or can find the greens at an Asian or African grocery store, they’re worth trying. Sauté them with garlic, ginger, and a splash of soy sauce.
Grape Leaves
You probably know grape leaves as the wrapper for dolmas (stuffed grape leaves), but they’re also edible on their own. Young, tender grape leaves can be tossed into salads, fried until crispy, or blanched and used as a wrap for rice, grains, or meat. If you have grapevines growing nearby, pick the young, light-green leaves in spring.
Building a Simple Greens-Focused Meal
Here’s a practical scenario. It’s a weeknight, you’ve got 30 minutes, and you want to make greens the star of dinner rather than an afterthought.
Start by heating a big pan. Add olive oil, then some diced onion. Let that soften for a few minutes. Throw in garlic — three or four cloves, sliced thin. If you have any sturdy greens — chard, kale, beet greens — add the stems now. Cook for 3-4 minutes. Add the leaves, season with salt and pepper, and toss everything together. Splash in a little chicken stock (or vegetable stock, or even just water). Cover the pan and let the greens steam for about 5 minutes.
While that’s happening, fry or poach a couple of eggs. Toast some good bread. When the greens are tender, hit them with a squeeze of lemon and a drizzle of your best olive oil.
Pile the greens on the toast, nestle the eggs on top, crack some black pepper over everything, and maybe a few flakes of Parmesan or crumbled feta. That’s dinner. It’s fast, it’s balanced, and it costs almost nothing.
If you want to round it out even more, a bowl of well-made pasta with your sautéed greens tossed right in is always a winner.
Storing and Prepping Greens So They Actually Last
One reason people waste so many greens is that they go bad quickly. You buy a bunch of kale on Monday, and by Thursday it’s yellow and slimy. Here’s how to stretch their life.
Wash and dry them properly. Fill a big bowl or your clean sink with cold water. Submerge the greens and swish them around. Dirt and sand sink to the bottom. Lift the greens out (don’t pour them through a colander, which just dumps the dirt back on them). Repeat if necessary. Then dry them thoroughly — a salad spinner is ideal, or you can lay them on clean kitchen towels and pat dry. Knowing how to properly clean your produce applies to greens just as much as it does to mushrooms.
Store them with a paper towel. Wrap clean, dry greens loosely in a paper towel and place them in a zip-top bag or container in the fridge. The paper towel absorbs excess moisture, which is the main thing that causes greens to deteriorate. Stored this way, most greens last 5-7 days easily.
Don’t chop until you’re ready to cook. Cutting greens exposes more surface area to air and speeds up wilting. Keep leaves whole until you’re about to use them.
If your greens are already looking a little sad — slightly wilted but not slimy or yellowed — they’re still fine for cooking. Wilted greens that you wouldn’t want in a salad will be indistinguishable from fresh ones once sautéed or braised.
A Note on Nutrition (Without the Lecture)
You already know greens are good for you. You don’t need another article telling you they’re “packed with vitamins and minerals.” But a couple of things are worth knowing because they actually affect how you cook.
Dark greens like kale, collards, and spinach are high in oxalates — compounds that can bind to calcium and reduce how much your body absorbs. Cooking reduces oxalate content significantly. So if you’re eating greens partly for their calcium (as many plant-based eaters do), cooked greens give you more available calcium than raw ones.
Fat-soluble vitamins like A, K, and E — all abundant in leafy greens — are better absorbed when eaten with some fat. This isn’t just a nutritional footnote. It’s a genuine argument for always cooking or dressing your greens with olive oil, butter, or another fat. The “dry steamed kale” approach might sound virtuous, but your body actually gets more from greens when there’s fat involved. If you’re already eating healthier using an air fryer, tossing greens in a little oil before air-frying them at high heat is another good option.
FAQ
Can you eat any leaf, or are some dangerous?
Not all leaves are edible. Rhubarb leaves, tomato leaves (in large quantities), and leaves from plants in the nightshade family can be toxic. Stick to leaves from known edible plants — vegetables, herbs, and well-identified wild greens. If you’re foraging, never eat anything you can’t identify with 100% certainty. When in doubt, leave it.
What’s the fastest way to cook leafy greens?
Sautéing in a hot pan with oil and garlic is the fastest method for most greens — tender ones like spinach take under 2 minutes, and sturdier greens like chard take about 5-7 minutes. If you want speed and hands-off cooking, microwaving washed greens in a covered bowl for 2-3 minutes also works surprisingly well.
How do you get kids to eat leafy greens?
Hiding them works better than you’d think. Blend spinach or kale into pasta sauces, smoothies, or scrambled eggs. Kale chips with a little salt and Parmesan are genuinely snackable. And involving kids in cooking — letting them wash the leaves, tear them up, or pick a seasoning — makes them much more likely to eat the finished product. It’s less about the specific green and more about reducing the unfamiliarity.
Are raw greens healthier than cooked greens?
It depends on the nutrient you’re looking at. Raw greens retain more vitamin C and certain B vitamins, which are heat-sensitive. But cooked greens have more bioavailable iron, calcium, and beta-carotene. The honest answer? Eat them both ways. A mix of raw salads and cooked greens across the week gives you the broadest nutritional benefit.
Can I freeze leafy greens?
Yes, but blanch them first. Raw greens don’t freeze well — they turn mushy and discolored. Blanch them for 1-2 minutes, shock in ice water, squeeze out all the water, and freeze in portions. They’ll keep for 6-8 months and are perfect for adding to soups, stews, smoothies, and pasta later.
Your Greens Are Waiting
Think about this for a moment — you’ve probably been throwing away free vegetables for years without realizing it. Those beet tops. The frilly greens on your carrots. The celery leaves you automatically strip off and discard. They’re all food, and they’re all good food when you know what to do with them.
The real trick to cooking greens isn’t any single recipe or technique. It’s understanding that different leaves need different treatment, and that fat, acid, and salt are your best tools for making any green taste great. Start with one new green this week. Maybe grab a bunch of chard if you’ve never cooked it. Or save the tops from your next bunch of beets and sauté them with garlic. Once you see how simple it is, you’ll start looking at every leaf differently.
And if you want to take your kitchen skills further — whether it’s getting your knife work sharper or organizing your cooking space so prep feels less chaotic — those are natural next steps that’ll make cooking greens (and everything else) feel even easier.